


Wet Room Bathrooms: Design and Cost
On this page
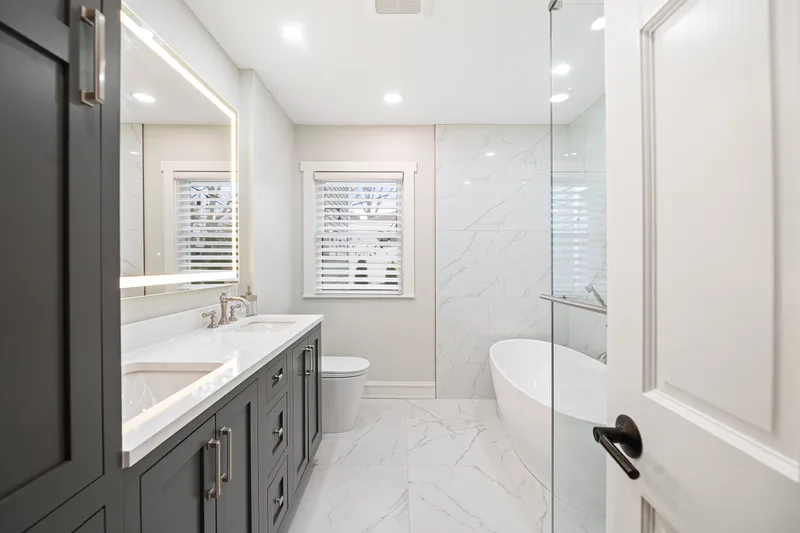
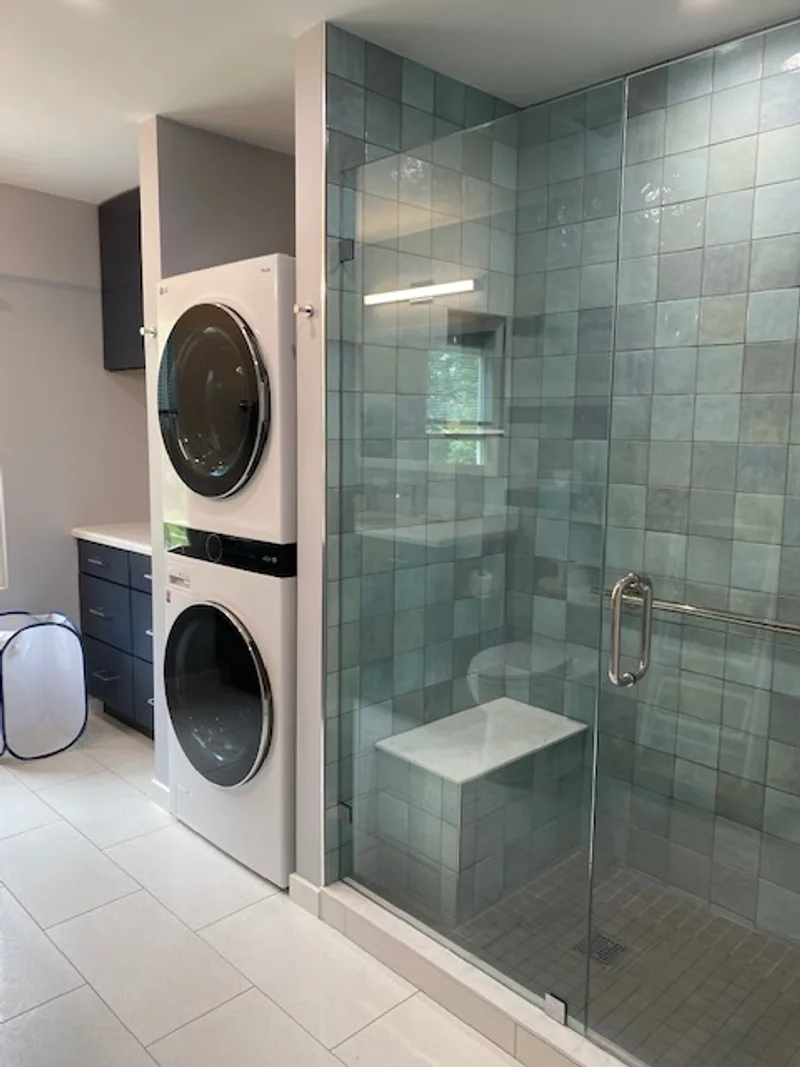
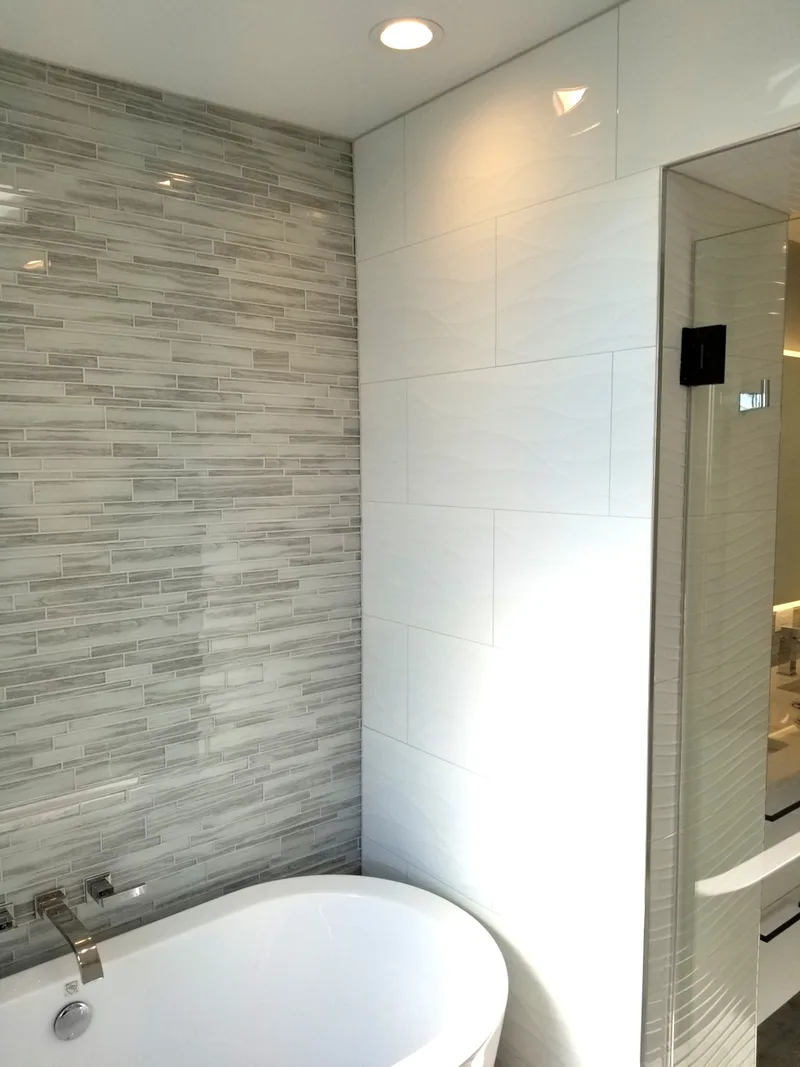
A wet room is one of the most technically demanding bathroom configurations to execute correctly, and one of the most forgiving to live with once it is right. The shower has no enclosure. The entire floor is waterproofed, sloped, and drained to handle water across the whole surface. No curb, no door to maintain, no threshold to step over.
Done correctly, it is a functional, visually clean bathroom that suits both everyday use and accessibility needs. Done with shortcuts on waterproofing, it is an expensive water damage problem that does not reveal itself for months or years after installation. Understanding what separates a well-built wet room from a poorly executed one is the most important thing a homeowner can know before starting the project. Our bathroom remodeling services outline how wet room projects are scoped, structured, and sequenced from the initial assessment through construction.
What Makes a Wet Room Different from a Standard Shower
In a conventional bathroom, the shower is a distinct waterproofed zone with a defined pan or base. The rest of the bathroom floor is treated as dry space.
In a wet room, the entire floor (and often the lower portion of all walls) is waterproofed to handle routine water exposure. The shower area flows directly into the rest of the room with no curb, door, or enclosure boundary. A linear drain or center drain handles water from the entire floor area.
This creates specific practical differences:
- No door or curtain to maintain or clean
- No step-over threshold; the floor is continuous from outside the bathroom into the shower area
- The entire floor must slope toward the drain, which means the floor is not completely flat anywhere
- Every surface exposed to the shower zone must be waterproofed and tiled with materials rated for continuous water contact
A wet room is not the same as a doorless shower in an otherwise standard bathroom. A doorless shower has a defined waterproofed pan; the rest of the bathroom floor is standard. A wet room treats the entire room as a water-exposure zone.
A wet room is also incompatible with a steam shower. Steam requires a fully sealed enclosure with a ceiling and no vent openings. A wet room's open design allows steam to escape freely; the two configurations work from opposite premises. See our steam shower guide for what a proper steam enclosure requires.
The Structural Assessment Comes First
Before a wet room can be planned in detail, the existing structure must be evaluated. Wet rooms require a stable, level subfloor that can support the weight of the waterproofing system, the mortar bed, and large-format tile without flexing.
Subfloor requirements. Wood subfloor systems typically require reinforcement before a wet room is built over them. Deflection (the natural flex in a wood floor) causes tile and grout to crack over time. In most cases, this means adding a second layer of plywood, installing concrete backer board, or using a crack isolation membrane rated for the expected movement.
The pre-war balloon-frame complication. A significant share of North Shore homes, particularly in Kenilworth (platted 1889-1890s), Wilmette, Evanston, and Winnetka, which built out heavily in the 1890s-1920s, were built with balloon framing, where studs run full height from the sill plate to the roof without interruption. In balloon-frame construction, the floor system connection to the exterior wall is structurally different from platform framing, which affects how loads transfer. Any wet room project in a pre-1940 North Shore home should include a structural review before the subfloor plan is finalized, not to suggest the project cannot proceed, but to confirm the approach is right for the specific framing conditions.
These same homes often have cast-iron drain lines and galvanized supply pipes. A camera inspection of the drain stack before finalizing the wet room plan is standard practice on pre-1970 homes. Moving drain locations in cast-iron requires cutting and rejoining the stack, a plumbing scope item worth pricing before design is locked.
Drain placement. The drain position determines everything about floor slope. In a full gut renovation, the drain can go where the design calls for it. In a renovation of an existing bathroom, the drain location is constrained by the existing plumbing stack; moving it is possible but adds cost. Discuss this early.
Ceiling height. Because the floor of a wet room is sloped and sometimes slightly raised to accommodate the drainage system, ceiling height can become a factor in a basement or lower-level bathroom. This is worth checking before the project begins.
Waterproofing: The Most Important Phase
The waterproofing system is the foundation of a wet room. It is also invisible once tile is installed, which means a homeowner has no way to verify it after the fact. This is why contractor selection and communication during this phase matters more than in most renovation projects.
Sheet membrane vs. liquid membrane. Two primary systems are used. Sheet membranes (such as Schluter Kerdi or similar products) are pre-formed waterproof sheets adhered to the substrate. Liquid membranes are brush- or roller-applied and cure to form a continuous waterproof layer. Both work well when installed correctly. Sheet membranes are more predictable in thickness and coverage; liquid membranes require careful application technique to achieve consistent film thickness.
Critical failure points. The corners where walls meet the floor, the drain connection, and any penetrations (pipe locations, grab bar anchors) are where wet room waterproofing most commonly fails. These transitions need to be sealed and integrated into the membrane with reinforcing fabric and overlapping layers. Ask your contractor explicitly how they handle these details before tile goes down. A contractor who cannot explain the transition treatment in specific terms is one worth questioning.
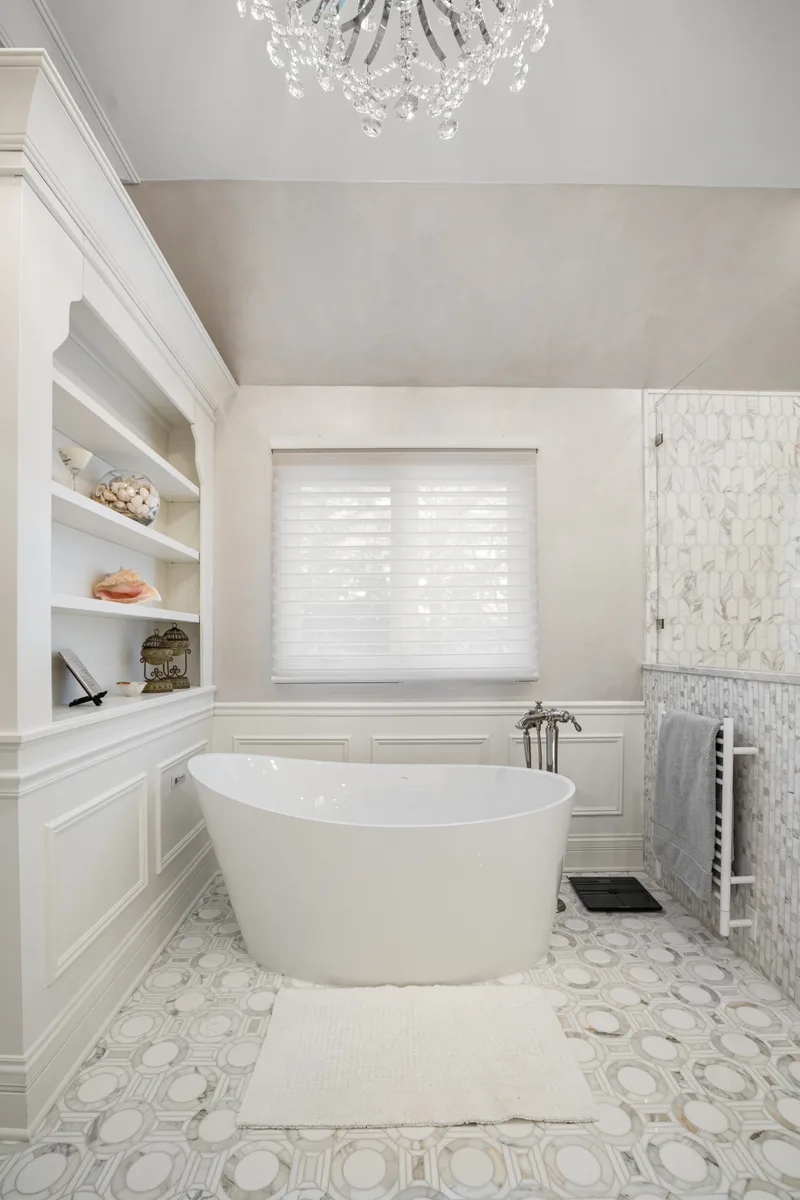
Wall waterproofing height. In a wet room where the shower area is adjacent to a freestanding tub or vanity, waterproofing on the walls should extend at least 6 inches above the height of any expected splash. For a full wet room where the showerhead is not in an enclosed zone, full wall waterproofing to ceiling height in the shower area is appropriate.
Cure time is not negotiable. Waterproofing membranes need 24-72 hours to cure before tile can be set; the exact time depends on the product. A contractor who wants to tile the day after waterproofing is a contractor worth slowing down. This is the phase where shortcuts become expensive.
Material Selection for Wet Rooms
Slip resistance. The ANSI A137.1 standard uses a Dynamic Coefficient of Friction (DCOF) rating to measure slip resistance. For wet room floors, a DCOF of 0.42 or higher is the generally accepted minimum. Polished stone and glazed ceramic tile with smooth surfaces often do not meet this threshold. Matte-finish porcelain, unpolished stone, textured tile, and mosaic tile (where grout lines add traction) typically meet or exceed it.
Large-format tile on wet room floors. Tiles 24x24 and larger reduce grout joints and create a cleaner visual. They also require a very precisely sloped substrate; any variation in slope shows through large tile. Back-buttering (applying mortar to the back of each tile as well as the substrate) is required to achieve full mortar coverage and prevent hollow spots, which crack under load or temperature cycling.
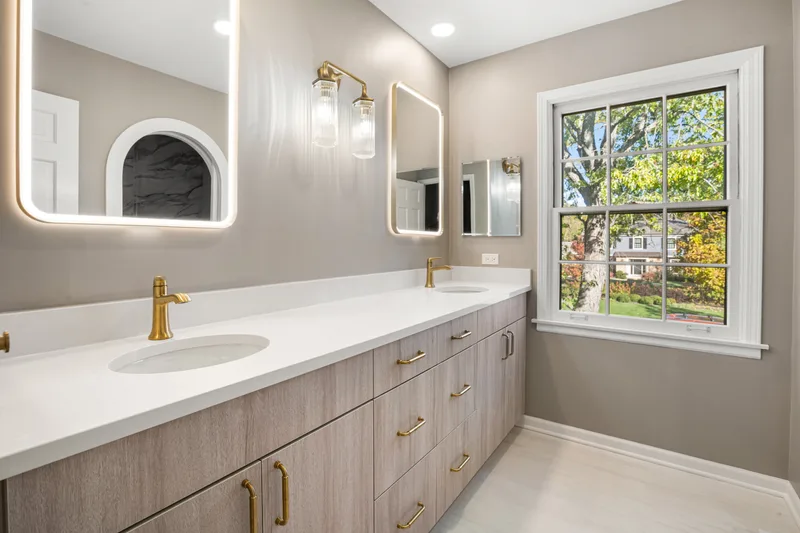
Wall materials. Large-format porcelain on the walls is the most popular choice. Natural stone (marble, travertine, slate) is durable when properly maintained, but requires sealing and is more demanding in a high-moisture environment. Porcelain with a stone-look finish is a practical middle ground. See our bathroom tile guide for a full breakdown of material options, finishes, and slip ratings.
Grout. Epoxy grout resists moisture, staining, and mold better than standard cement grout. In a wet room, particularly on the floor, the added durability is worth the slightly higher cost.
Ventilation and Humidity Management
A wet room produces more sustained humidity than a standard bathroom because the entire floor is a water surface during use. Adequate ventilation is not optional.
The standard sizing guideline from the Home Ventilating Institute (HVI) is 1 CFM per square foot of bathroom area, minimum 50 CFM. For a wet room, ventilating toward the higher end of that range is appropriate. The fan should be rated for wet or damp locations and positioned as close to the shower zone as the ceiling layout allows.
In the North Shore homes Delta - Bathroom and Kitchen Remodeling works in, particularly pre-war homes in Glencoe, Wilmette, and Evanston, bathroom exhaust was often vented into the attic rather than to the exterior. This is a code violation under IRC Chapter 15 and causes long-term structural damage from moisture accumulation. A wet room conversion is the right time to correct the duct routing.
A humidity-sensing fan activates automatically when moisture reaches a threshold and runs until humidity drops, removing the human variable from the equation.
Planning Sequence: What the Process Looks Like
A wet room renovation involves more pre-construction planning than a standard shower remodel. The sequence matters, and early decisions have downstream consequences.
- Structural assessment: Subfloor condition, framing type, drain location, ceiling height, all evaluated before design is finalized.
- Drain selection and placement: Linear drain along a wall or traditional center drain? This decision affects floor slope direction and where tile patterns land.
- Waterproofing specification: Which system, how far it extends, how transitions and penetrations are handled. This should be explicit in the project scope document, not vague.
- Tile selection: Confirmed against slip resistance ratings and format requirements for the specific substrate slope.
- Fixture rough-in: Showerhead position, faucet placement, body spray or rain shower components, all positioned before tile goes down.
- Tile installation, grouting, sealing.
- Frameless glass panels if specified, accessories, fixture trim. Note: frameless shower glass is measured and fabricated after tile is complete. Per industry lead times, glass typically delivers 2-4 weeks after tile finishes. Build this into the schedule.
Skipping or compressing these stages is where wet room projects fail. The waterproofing has to cure before tile is installed. The drain connection has to be tested before the floor is closed. A contractor who wants to move faster than the process requires is a contractor worth questioning.
For a realistic assessment of whether your bathroom is a good candidate for a wet room conversion, contact Delta - Bathroom and Kitchen Remodeling or review our bathroom remodeling services. If accessibility is part of your motivation for a wet room layout, see our accessible bathroom design guide for the standards that apply, and our comparison of accessible vs. standard remodel to understand what the design differences mean for scope and budget.
Delta - Bathroom and Kitchen Remodeling handles bathroom remodeling on the North Shore including wet room projects in Lake Bluff and surrounding communities.
Ready to Start Your Project?
Schedule a free consultation. We bring design ideas, material samples, and honest answers.
Get Free Consultation