


Luxury Bathroom Remodel Ideas: From Fixtures to Finishes
A luxury bathroom remodel is not about spending the maximum amount of money — it is about making deliberate choices in a few key areas that most people underestimate: lighting, tile scale, fixture finish, and the tub or shower centerpiece. If you’re drawn to a warmer, nature-inspired direction, our guide to organic bathroom design covers that specific approach in depth. For a full spa bathroom design aesthetic, there’s a dedicated guide for that as well.
This guide covers each of those areas with specific decisions you can make and discuss with your contractor. If you are planning a master bathroom remodel on the North Shore, these are the details that separate a genuinely high-end result from a bathroom that just has expensive materials installed carelessly.
Lighting Is the Most Overlooked Element in a Bathroom Remodel
Most bathroom lighting plans stop at a single overhead fixture and a basic vanity bar. That approach produces flat, harsh light that makes the space feel utilitarian.
A well-lit luxury bathroom uses at least three layers:
Ambient lighting provides overall illumination. Recessed fixtures on a dimmer are standard. In a larger master bathroom, a ceiling-mounted statement fixture — a flush-mount chandelier, a drum pendant, or a series of small pendants — gives the room visual weight.
Task lighting at the vanity is where most people get it wrong. Wall sconces mounted at eye level on either side of the mirror (not above it) eliminate facial shadows for grooming. The ideal mounting height is 60 to 65 inches from the floor to the center of the fixture.
Accent lighting creates atmosphere. Undermount cabinet lighting, LED strips recessed behind a floating vanity, or tealight holders positioned around a soaking tub all contribute to a space that feels intentionally designed rather than assembled.
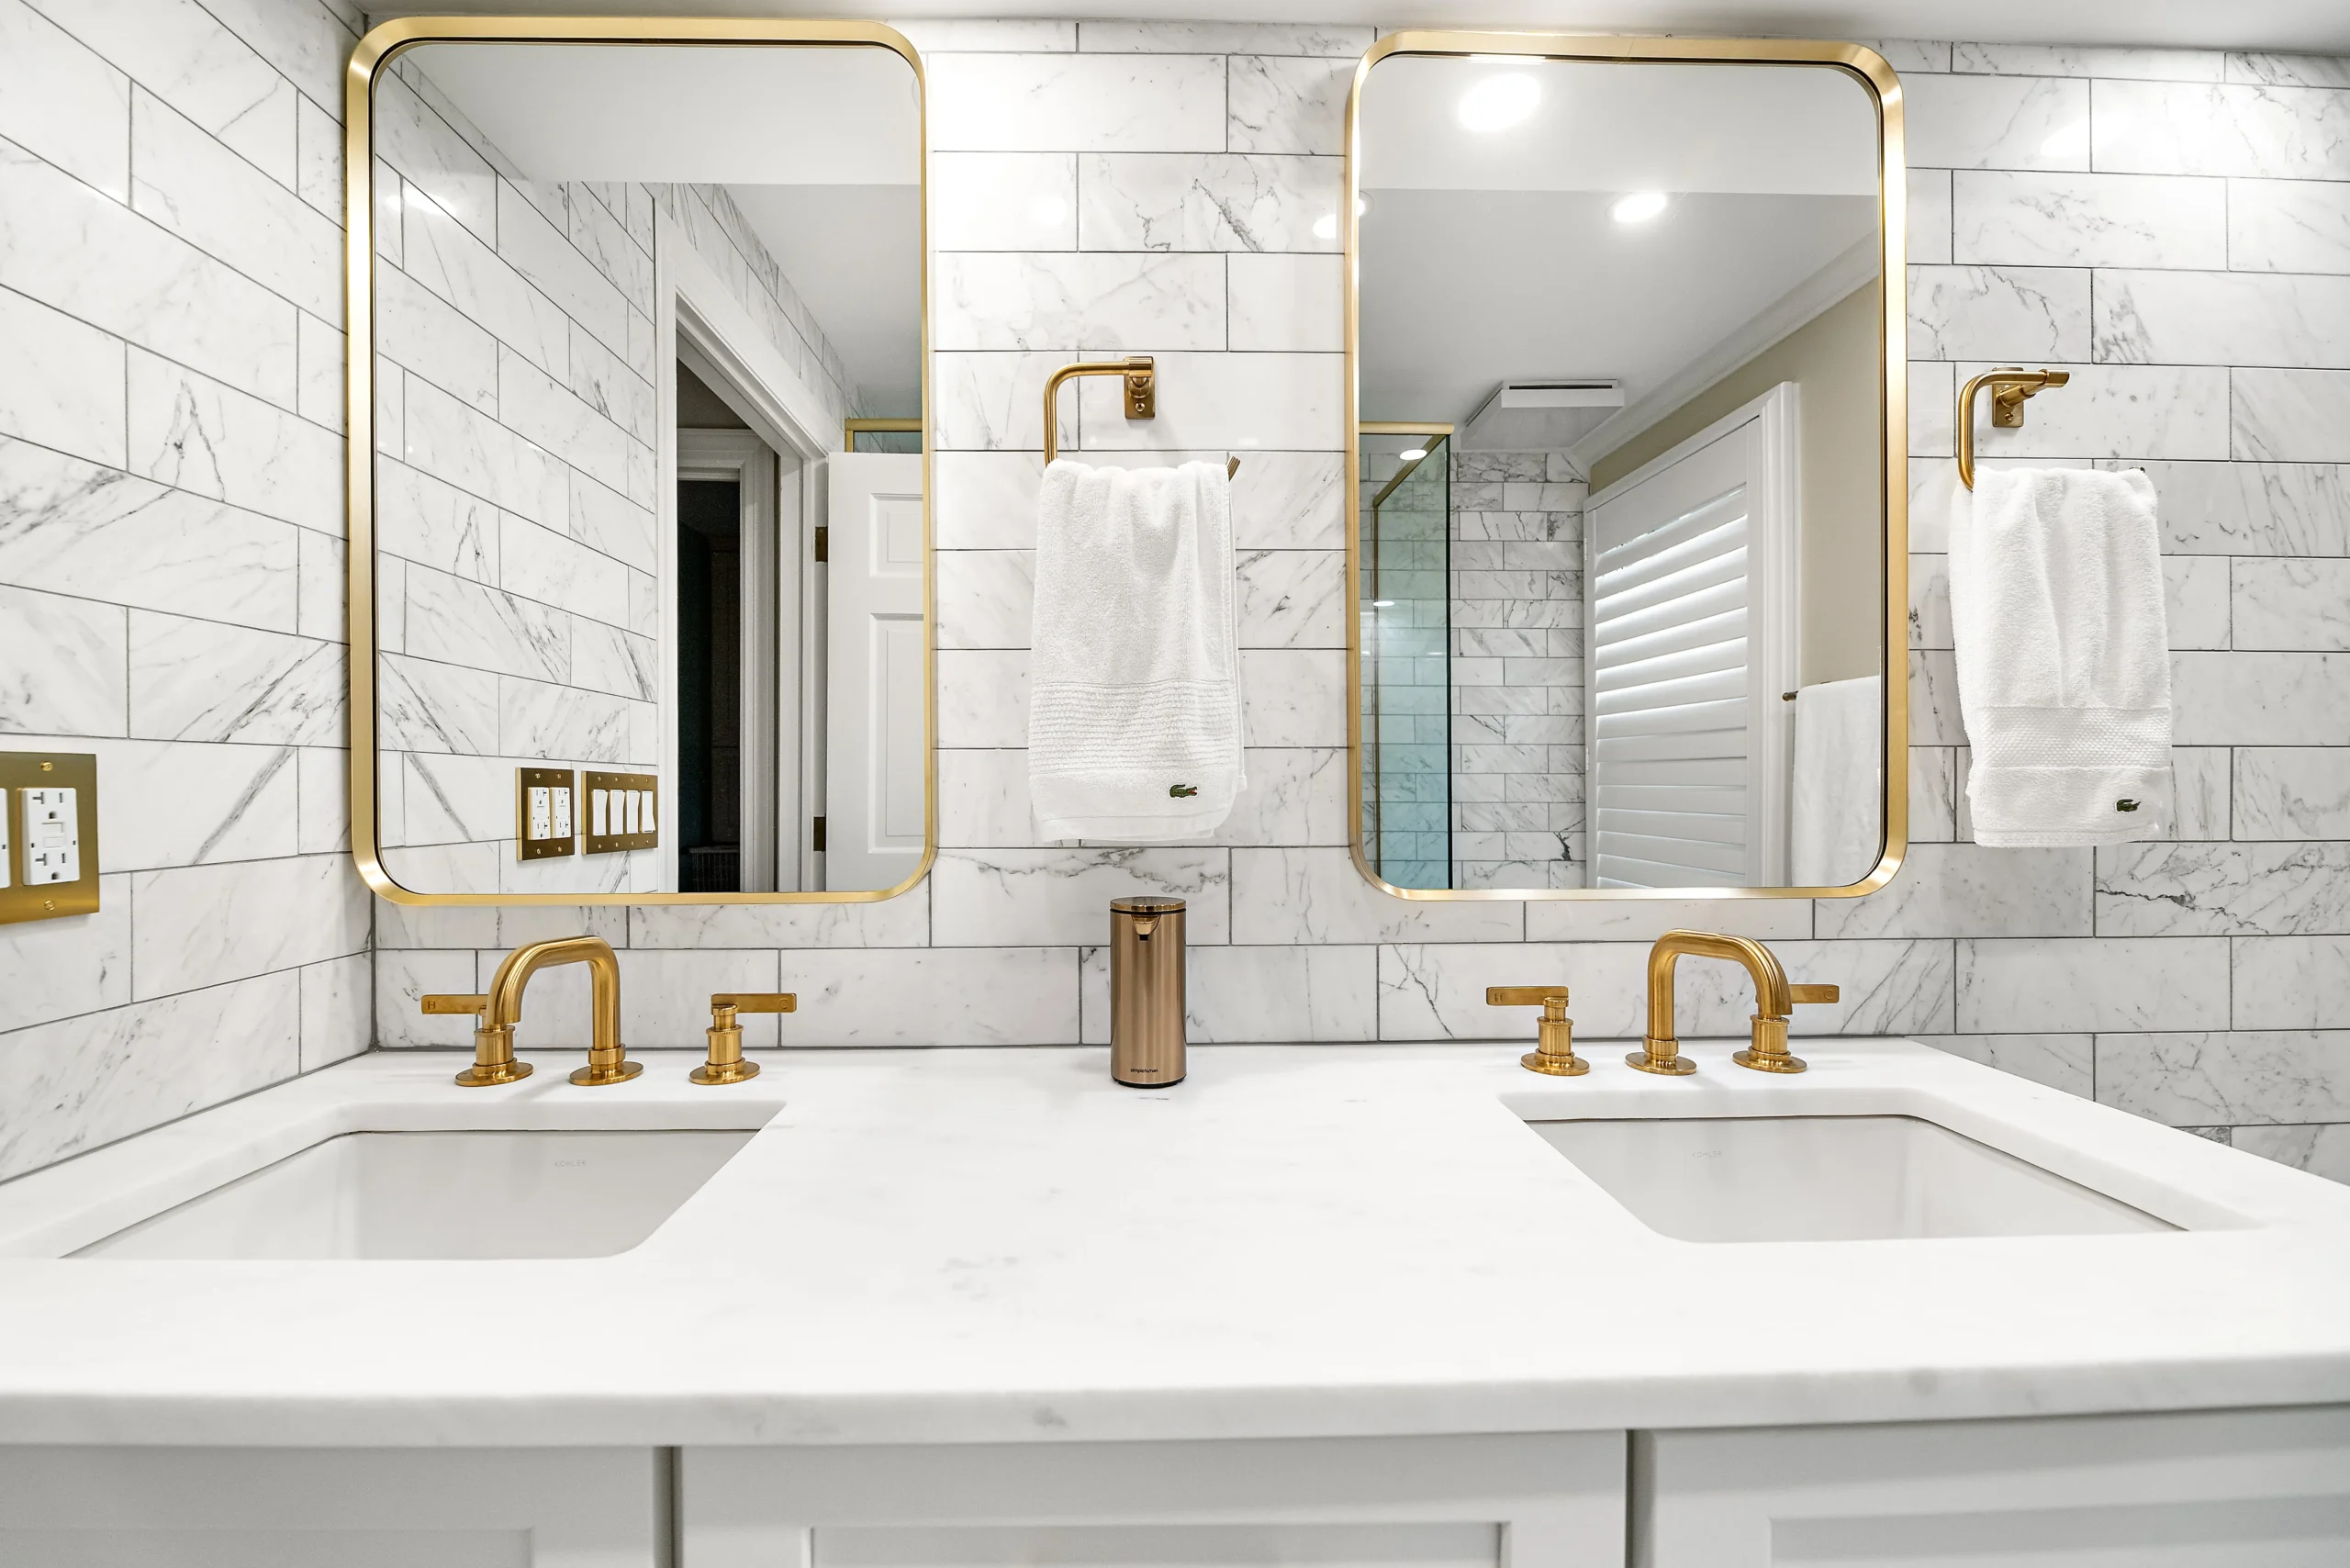
The finish of your light fixtures should match or intentionally contrast your plumbing fixtures. Brushed nickel and matte black read as modern. Polished chrome is clean and versatile. Warm brass and unlacquered brass have become popular on the North Shore for master bathrooms with stone or natural wood accents.
The Case for a Statement Tub — and When to Skip It
A freestanding tub is the single item most often associated with a luxury master bathroom remodel, but it is not always the right choice for every homeowner or every floor plan.
When it makes sense: You have at least 55 to 60 square feet of usable bathroom space, you actually use a bathtub regularly, and you are staying in the home long enough to justify the investment. Freestanding tubs require thoughtful placement — they need clearance on all sides, and the plumbing rough-in needs to be positioned correctly before tile is set.
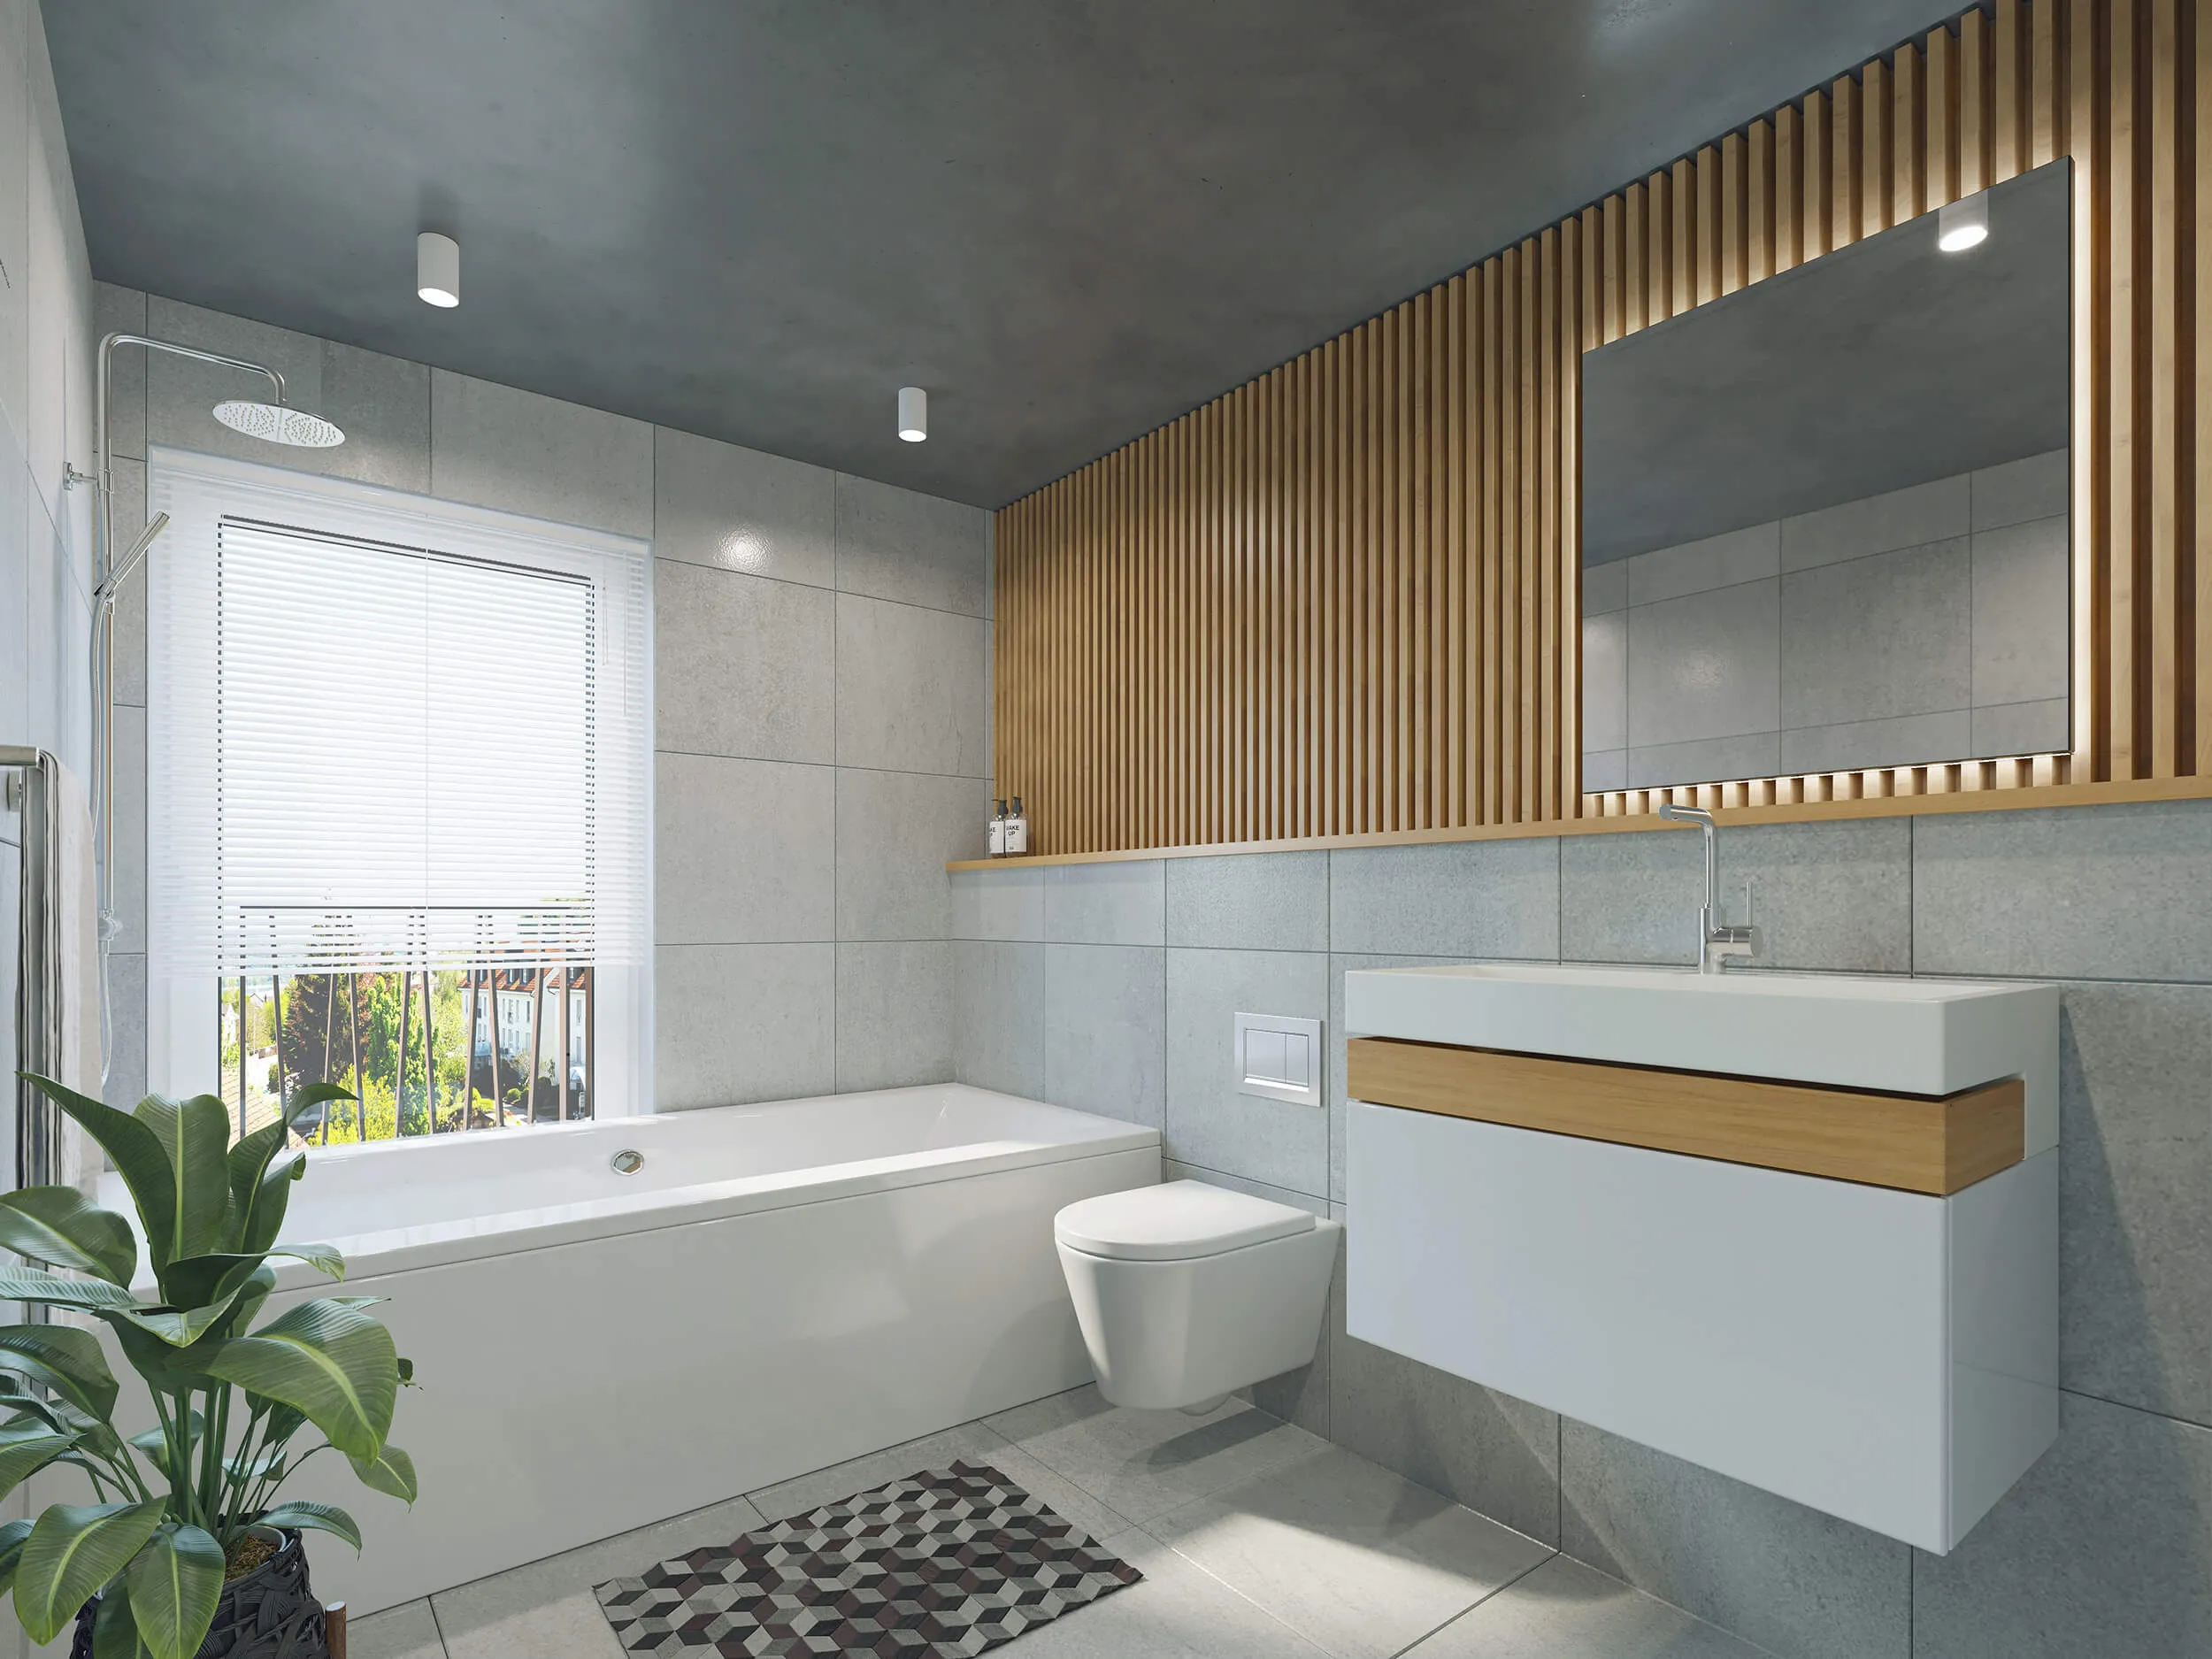
What to look for: A clean-lined pedestal or slipper silhouette reads as current. A clawfoot tub works in traditional or transitional interiors. Acrylic and composite resin tubs are lighter and easier to install than cast iron but feel less substantial underfoot. Cast iron retains heat longer and tends to outlast acrylic by decades.
When to skip it: If you have a smaller master bathroom and the choice is between a properly sized walk-in shower and a tub, the shower almost always wins for daily usability. A soaking tub that fits awkwardly into the room or requires the shower to be undersized is a compromise that most homeowners regret.
If you want both and the floor plan allows it, a drop-in tub built into a tile surround with a low-profile deck is an efficient solution that still delivers the visual impact of a dedicated soaking tub.
Shower Upgrades That Actually Change the Experience
Shower quality is where luxury bathrooms earn their day-to-day value. A well-designed shower surround, the right showerhead configuration, and a properly sized enclosure make a meaningful difference every morning.
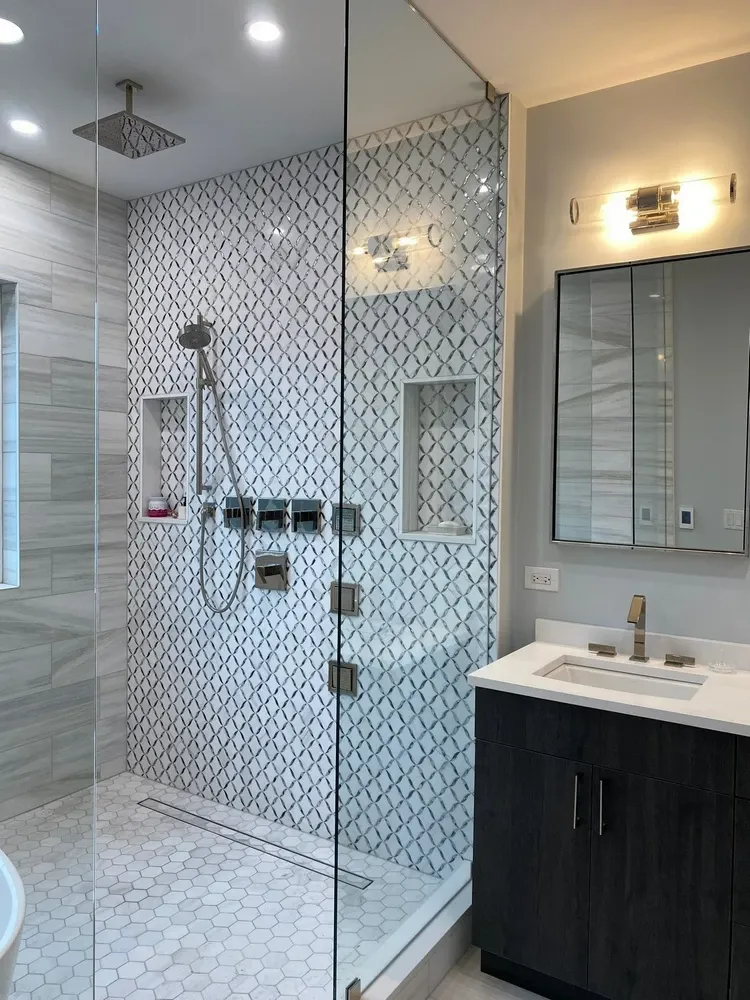
Enclosure approach: Frameless glass panels with minimal hardware are the current standard for master bathroom showers. They keep sightlines clean and make the tile work the visual focus. For a doorless walk-in configuration, the shower needs to be large enough — typically a minimum of 36 by 48 inches for a standard entry, with proper slope and drain positioning to prevent water migration. Delta Remodels covers doorless shower sizing and design considerations in more depth at /bathroom-remodeling/.
Showerhead options: A fixed overhead rain showerhead (8 to 12 inches wide) combined with a handheld unit on a slide bar covers most homeowners’ needs. Body jets add a spa feel but require additional volume capacity from your water heater — your contractor should confirm your system can support them before the rough-in is finalized.
Tile in the shower: Large-format porcelain (24x24 or 12x24) with minimal grout joints reads as clean and contemporary. Natural stone like marble or travertine adds visual warmth but requires sealing and more maintenance. A full-height tile installation, running from floor to ceiling, makes the shower feel taller and more finished than a partial tile-to-paint approach. Our bathroom tile guide goes into more detail on format, finish, and material trade-offs.
Shower bench: A built-in tiled bench on the back or side wall is a small addition with outsized impact on daily comfort. It also adds visual structure to the space without taking up floor area.
Tile, Stone, and Surface Choices That Hold Up Over Time
Material selection is where a luxury bathroom either looks cohesive or feels like a collection of expensive choices that do not connect.
Large-format tile: Tiles in the 24x24, 24x48, or larger format reduce grout lines and make the floor and walls feel more unified. They require a perfectly flat substrate — any variation in the subfloor or wall framing will telegraph through large-format tile. This is one reason material selection and installation quality are inseparable.
Marble and marble-look options: Genuine marble is beautiful and does require care — it needs to be sealed on installation and periodically afterward, and it will etch if exposed to acidic cleaners or cosmetics. Porcelain tile in a marble-look finish offers nearly identical visual character with significantly lower maintenance. For high-traffic master bathrooms with multiple users, porcelain marble-look tile is often the more practical choice without sacrificing the aesthetic.
Wall and floor coordination: The most successful luxury bathrooms use tile in a coherent color family with variation in format, finish, or pattern to add interest. Matte tile on the floor, a matching or complementary polished tile on the shower walls, and a contrasting accent tile or decorative border in a niche creates a layered look without becoming busy.
Natural elements: Wood-look porcelain plank flooring, actual teak shower benches, and stone vessel sinks all add warmth to a bathroom that might otherwise feel cold. These natural textures balance the hard surfaces that dominate a bathroom environment. Heated floors are another element worth considering at this level — our heated bathroom floors guide covers the practical case, installation requirements, and cost.
Hardware Finishes and Fixture Details
Fixture and hardware finish is the detail that ties a luxury bathroom together. Inconsistency here — chrome fixtures with brushed gold hardware, or matte black faucets against polished chrome towel bars — reads as unfinished regardless of how expensive the individual components are.
Current finishes: Matte black hardware continues to be popular in contemporary and transitional bathrooms. Brushed gold and warm brass work well in bathrooms with stone or white cabinetry. Brushed nickel is versatile and works in almost any setting. Polished chrome is classic and will not go out of style.
Where to maintain consistency: At minimum, your plumbing fixtures (faucets, shower trim, tub filler), towel bars and rings, toilet paper holder, and cabinet pulls should share a finish family. Mirror frames and light fixtures can introduce a complementary finish as a deliberate accent.
Vanity considerations: Double vanities with separate mirrors and a pair of wall sconces between them have become standard in master bathroom remodels. A floating vanity (wall-mounted) with storage below creates the illusion of more floor space and allows for undermount lighting, which adds to the luxury feel without additional square footage.
Medicine cabinets: Recessed medicine cabinets with interior lighting are practical additions that do not take up wall space. In a luxury master bathroom, a large-format mirror with integrated LED perimeter lighting is also a popular option that eliminates the need for separate sconce mounting.
Working with a Contractor on a Luxury Bathroom Remodel
The difference between a luxury bathroom that photographs well and one that functions well over years of daily use comes down to planning and installation quality. Before demolition begins, the layout should be finalized, all materials should be specified and lead times confirmed, and the plumbing and electrical rough-in locations should be locked.
Material choices affect each other. The tile you choose determines grout joint width and substrate requirements. The tub or shower base determines drain placement. The vanity depth determines how much clearance exists for the toilet and door swing. Working through these dependencies before construction starts prevents the mid-project changes that drive cost increases.
Delta Remodels handles bathroom remodeling projects across the North Shore, from Evanston to Lake Forest. If you are in the planning stage, the contact page is the right place to start. We review the space, discuss your priorities, and give you an honest assessment of what a well-executed luxury bathroom remodel looks like in your home.
For broader context on our bathroom work, visit /bathroom-remodeling/. If your project also involves a master bedroom renovation or the adjacent closet space, take a look at what we cover under /service-areas/ for your specific community.
Ready to Start Your Project?
Schedule a free consultation. We bring design ideas, material samples, and honest answers.
Get Free Consultation